
How to create tables and organize the room layout
DecoSublim lets you create round or rectangular tables, assign guests to individual seats, and position tables on a visual room plan. This tutorial follows the exact workflow available in the app.
1. Decide the table shape and capacity
Start with information from the venue: the number of tables, their shape, and their realistic capacity. In the Add Table form you can choose a round or rectangular table and one of the displayed capacities: 4, 6, 8, 10, or 12 seats.
The capacity in the planner should match the actual room setup. If the venue recommends eight people at a table, do not set ten simply to reduce the table count. Chair space, decorations, and circulation matter as much as the total number of seats.
- Confirm the size and shape of each table with the venue.
- Use the capacity you will have in the room, not only the theoretical maximum.
- Keep a few flexible seats for late changes.
- Use recognizable names such as Table 1, Bride's Family, or Terrace 1.
2. Create and edit tables in Table List
Select Add Table, enter the name, shape, and capacity, then save. When the name is left blank, the planner uses the next sequential default name, such as Masa 1. You can change it later from the edit control on each table.
Table List shows each table's occupancy and assigned guest names. Sort alphabetically or by occupancy in ascending or descending order to find incomplete tables quickly.
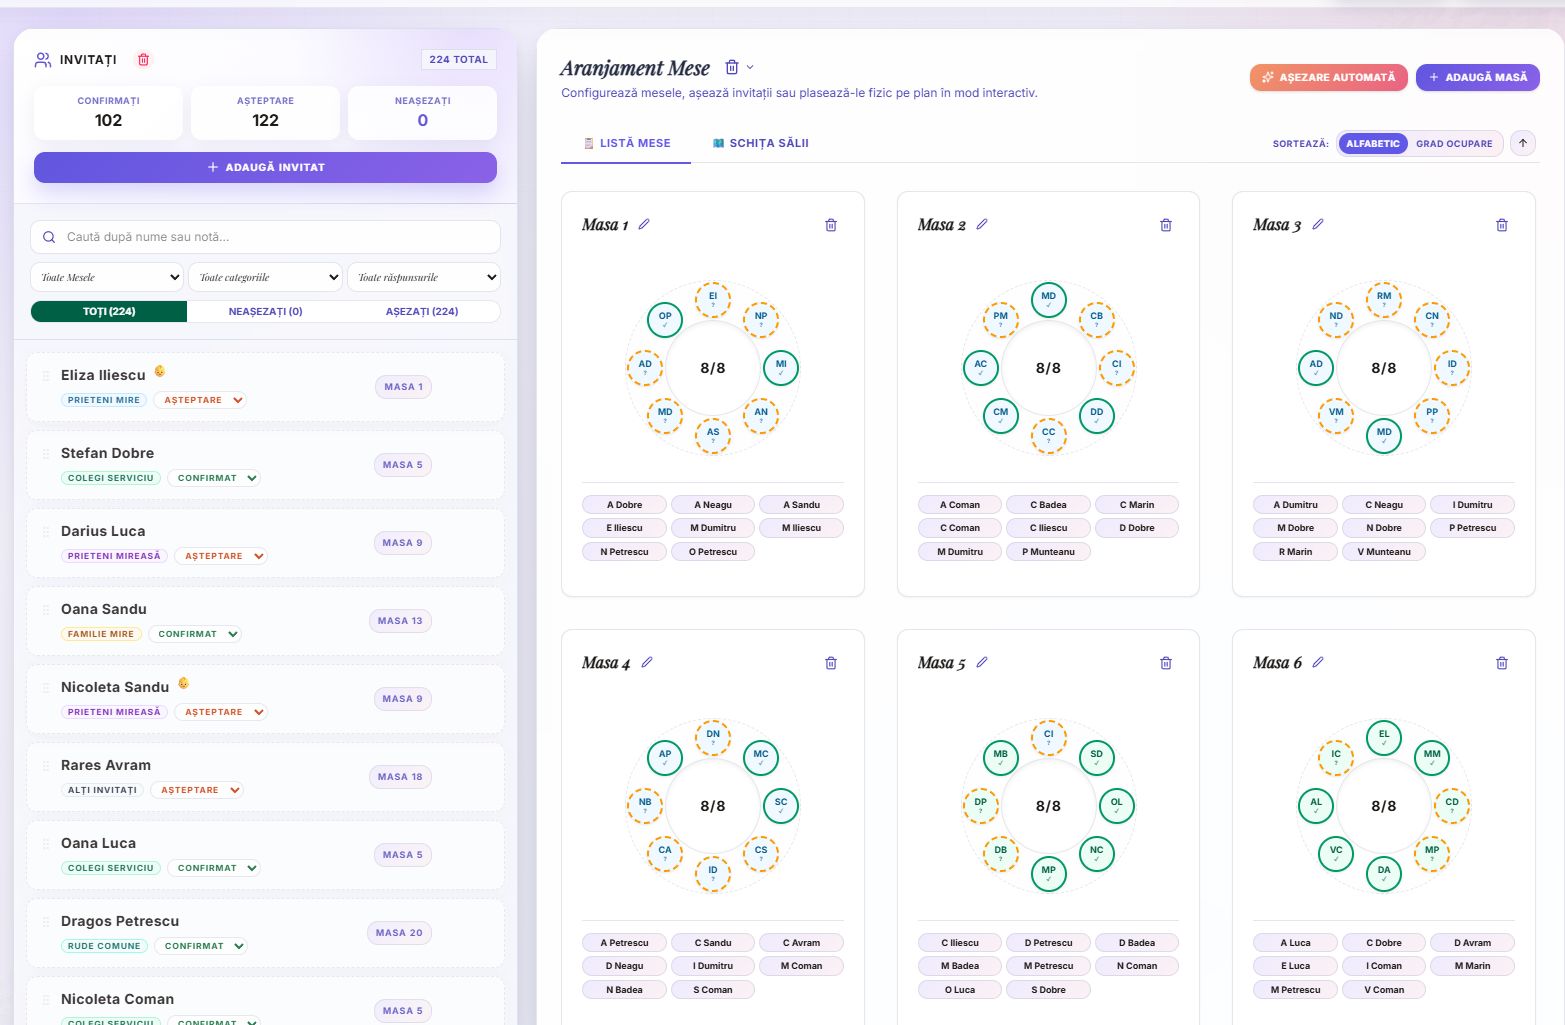
- Add a table with its name, shape, and capacity.
- Edit the same details later from the pencil icon.
- Track the occupancy-to-capacity ratio displayed in the center.
- Sort by occupancy to identify available seats.
3. Assign and move guests between seats
Drag an unseated guest from the left-hand list onto an available seat. Alternatively, select an empty seat marked with a plus and choose the person from the available-guest list.
When you move a guest who already has a seat, the planner removes them from the old table and assigns the new place. You can also clear one seat without deleting that guest from the event.
- Use drag and drop for fast assignment.
- Select an empty seat when you prefer to choose from a list.
- Check RSVP status before the final assignment.
- Filter guests by table, group, or response.
4. Position tables on the Room Layout
Switch from Table List to Room Layout to see every table on a 2D plan. Drag each table into the correct position relative to the stage and dance floor shown on the plan. Its position is saved when you release it.
Alignment guides help keep rows tidy. Leave circulation space between tables and around the dance floor, then use Details to return to a table's seats without leaving the layout.
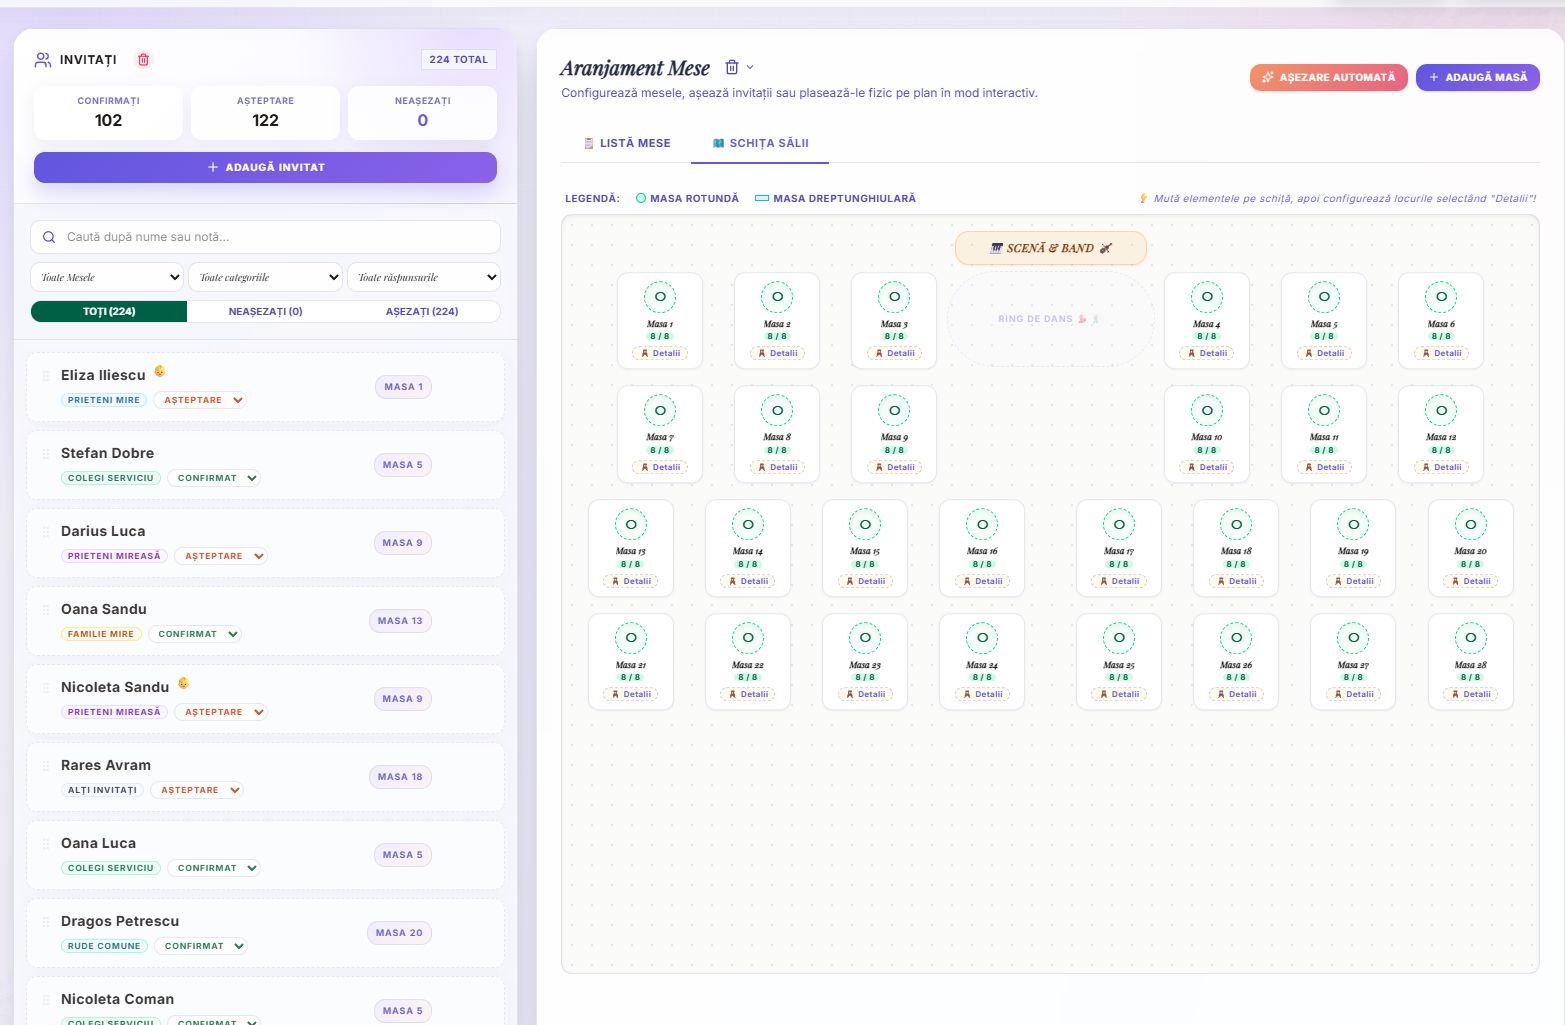
- Drag tables on the plan to reproduce the real room.
- Use the stage and dance floor as orientation points.
- Keep clear access to exits and important areas.
- Open Details to review the selected table's seats and guests.
5. Use Auto Seat as a starting point
Auto Seat assigns only unseated guests who are not marked Declined. Guests who already have a place keep it, and the planner fills open seats before creating new tables.
When there are not enough seats, the planner creates eight-seat round tables and tries to keep guests from the same group together. It also reorganizes table positions on the room layout, so run it before making your final manual positioning adjustments.
- Check groups and RSVP status before running it.
- Seat people with special requirements manually.
- Review every table after automatic assignment.
- Move tables into their final positions once the structure is stable.
Questions about tables and the room layout
Which table shapes and capacities can I choose?
The interface offers round and rectangular tables with quick options for 4, 6, 8, 10, or 12 seats. You can edit the shape and capacity later.
Can I move a guest after assigning a seat?
Yes. Drag the guest onto another seat or select them for the new seat; the planner removes the old assignment and saves the new one.
What does Auto Seat change?
It assigns eligible unseated guests, keeps existing assignments, creates eight-seat tables when needed, and reorganizes table positions on the room layout.
Are table positions saved?
Yes. Each table's position is saved after you move and release it on the room layout.
 DecoSublim Workshop
Custom Decorations & Accessories for Your Wedding
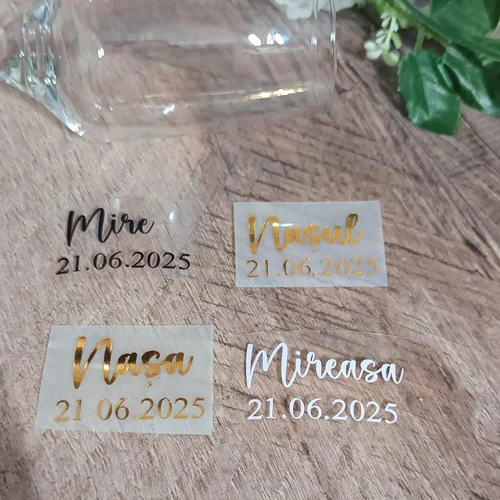
Beyond table planning, personalize every wedding detail: bespoke layered wooden names, glass vinyl stickers, custom cake toppers and engraved keepsake boxes.



Build your table plan in the app
Create tables, assign guests, and organize the room layout in one workspace. Planning is free; Print / PDF is activated separately only when you need it.
Start planning